How To Generate Contour Lines from Digital Elevation Model using DroneMapper
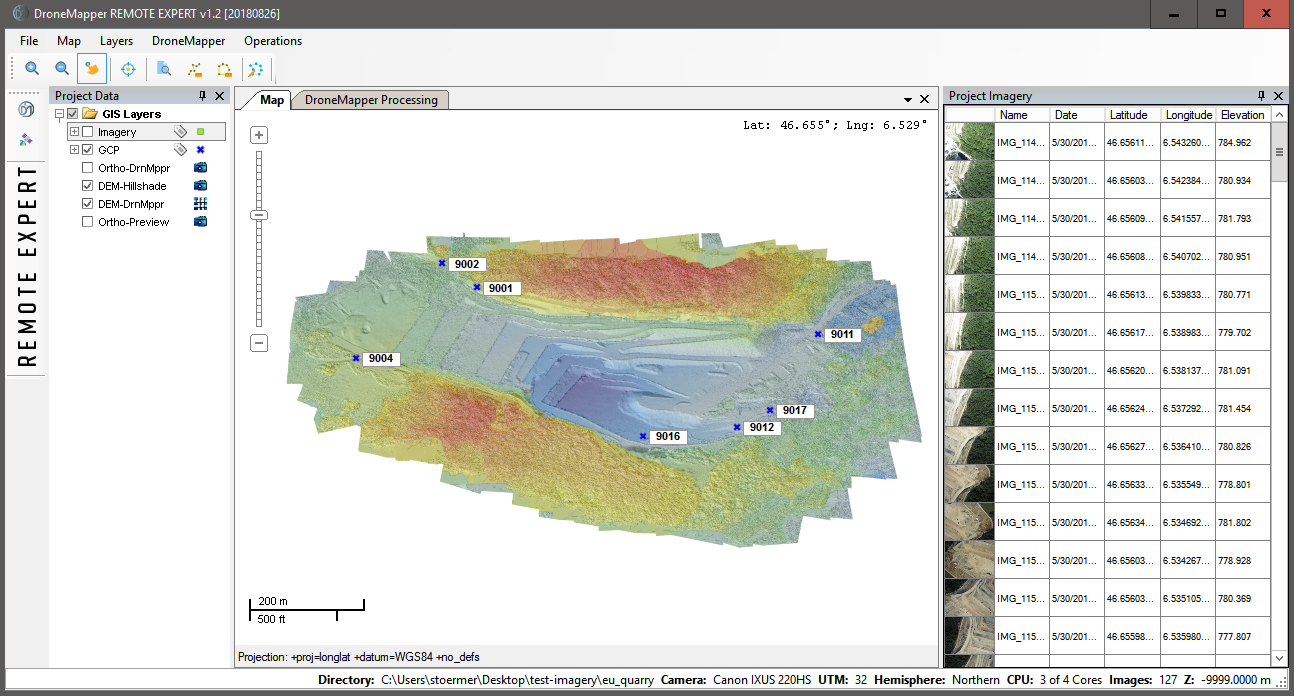
Once photogrametric processing has completed, the digital elevation model is available.
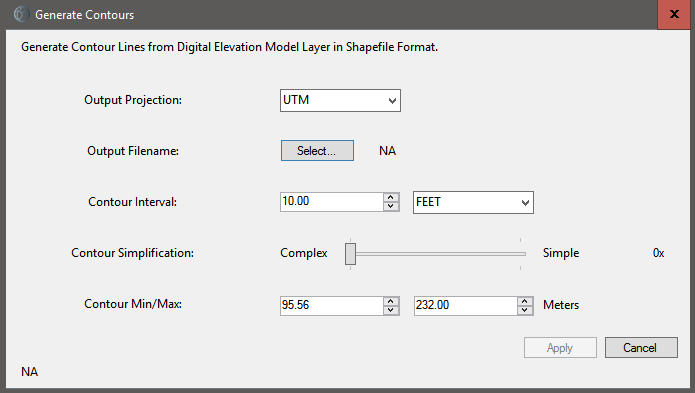
Navigate to the “Operations” menu and choose “Generate Contours”. You will be presented with the following dialog box and contour generation options: The following options are available during contour creation:
Output Projection – The resulting project of the contour lines. Options are UTM and Lat/Lon WGS84
Output Filename – The name of the shapefile that is created containing the generated contour lines/vectors
Contour Interval – The interval between contour lines. Allows input in feet or meters
Contour Simplification – A slider which will simply the output contour lines
Contour Min/Max – Restrict contour line generation between these elevations
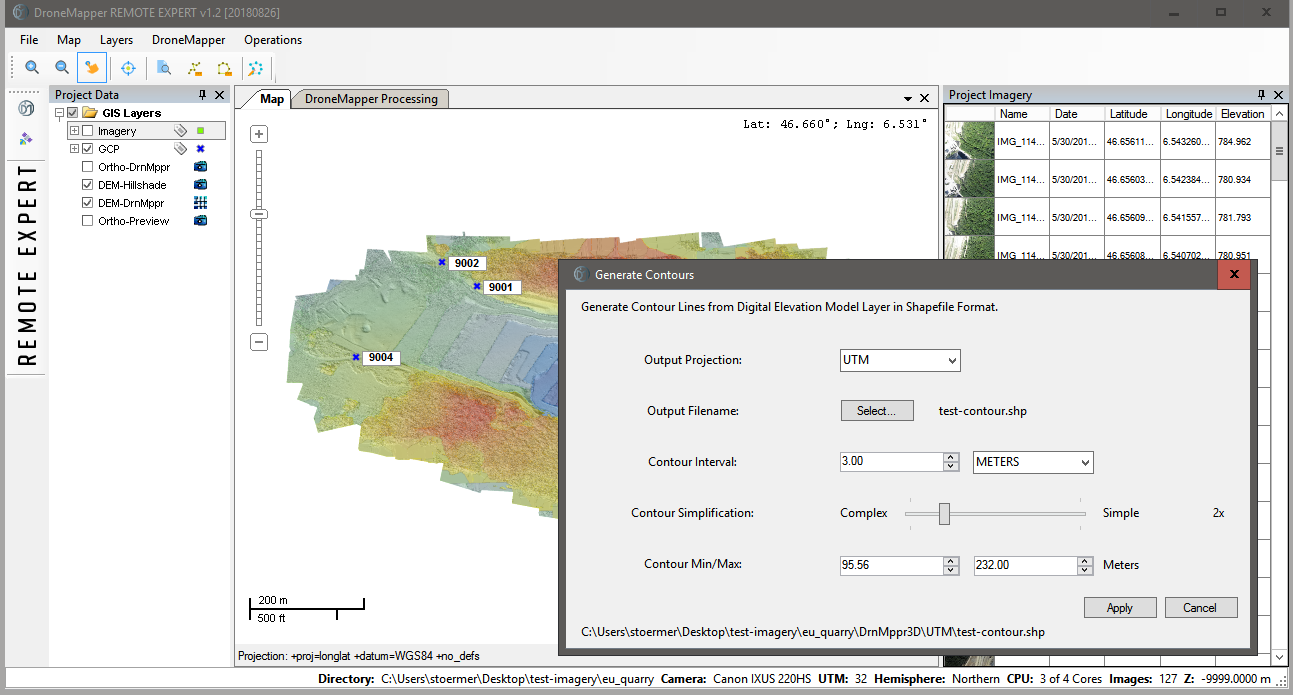
Determine the required options for contour generation, choose a filename and hit “Apply”: Once contour generation is completed, a new layer is created and displayed on the map tab. Here I’ve generated contours every 5 feet.
The contour line shapefile is saved to the local hard disk (usually inside the project folder):